Install and Configure Customization Manager
Customization Manager is distributed as an Orchid Extender module for Sage 300. Once installed using the Extender –> Setup –> Modules screen and configured through Extender –> Setup –> Custom Table Editor, it can be used to install and manage customizations to Sage 300.
If you haven’t already, download the most recent version of the Customization Manager module before getting started.
Download Customization Manager
Installation Video
This video walks through all the steps documented below in case you prefer a video.
Install the Module
Start by installing the Customization Manager module with Extender.
- Open the Extender –> Setup –> Modules screen.
- Click Import and select the
EXPIP.poplar.vifile.- Once the module has imported, close the Modules screen.
Configure the Module
Customization Manager uses API keys to keep customizations private. Configure your API key:
- Open the Extender –> Setup –> Custom Table Editor screen.
- From the select box, select Customization Manager and click Load.
- Input the API key and click Add.
- Close the Custom Table Editor.
Note
Before starting Customization Manager for the first time, restart the Sage desktop to register new components.
Start Customization Manager for the First Time
When Customization Manager is started for the first time, it upgrades the
pip package. The default version of pip that ships with Extender only
supports an out-dated encryption protocol that is no longer used, making
it impossible to install new packages securely.
Upgrading pip can take some time. First, the customization tries to
perform an in-place upgrade without downloading new packages.
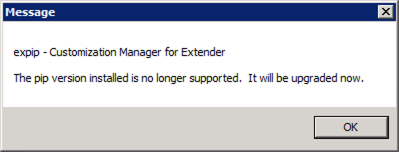
Before trying an in-place upgrade, this message is displayed.
If this isn’t possible, a new version is downloaded and installed.
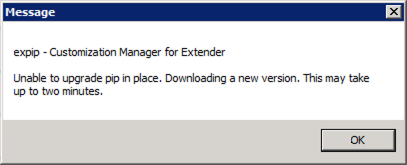
If an in-place upgrade isn’t possible, a new version is downloaded.
Together these steps can take up to three minutes. But the upgrade is only required on first start - you won’t see it again!
With the upgrade complete, the Customization Manager screen opens.
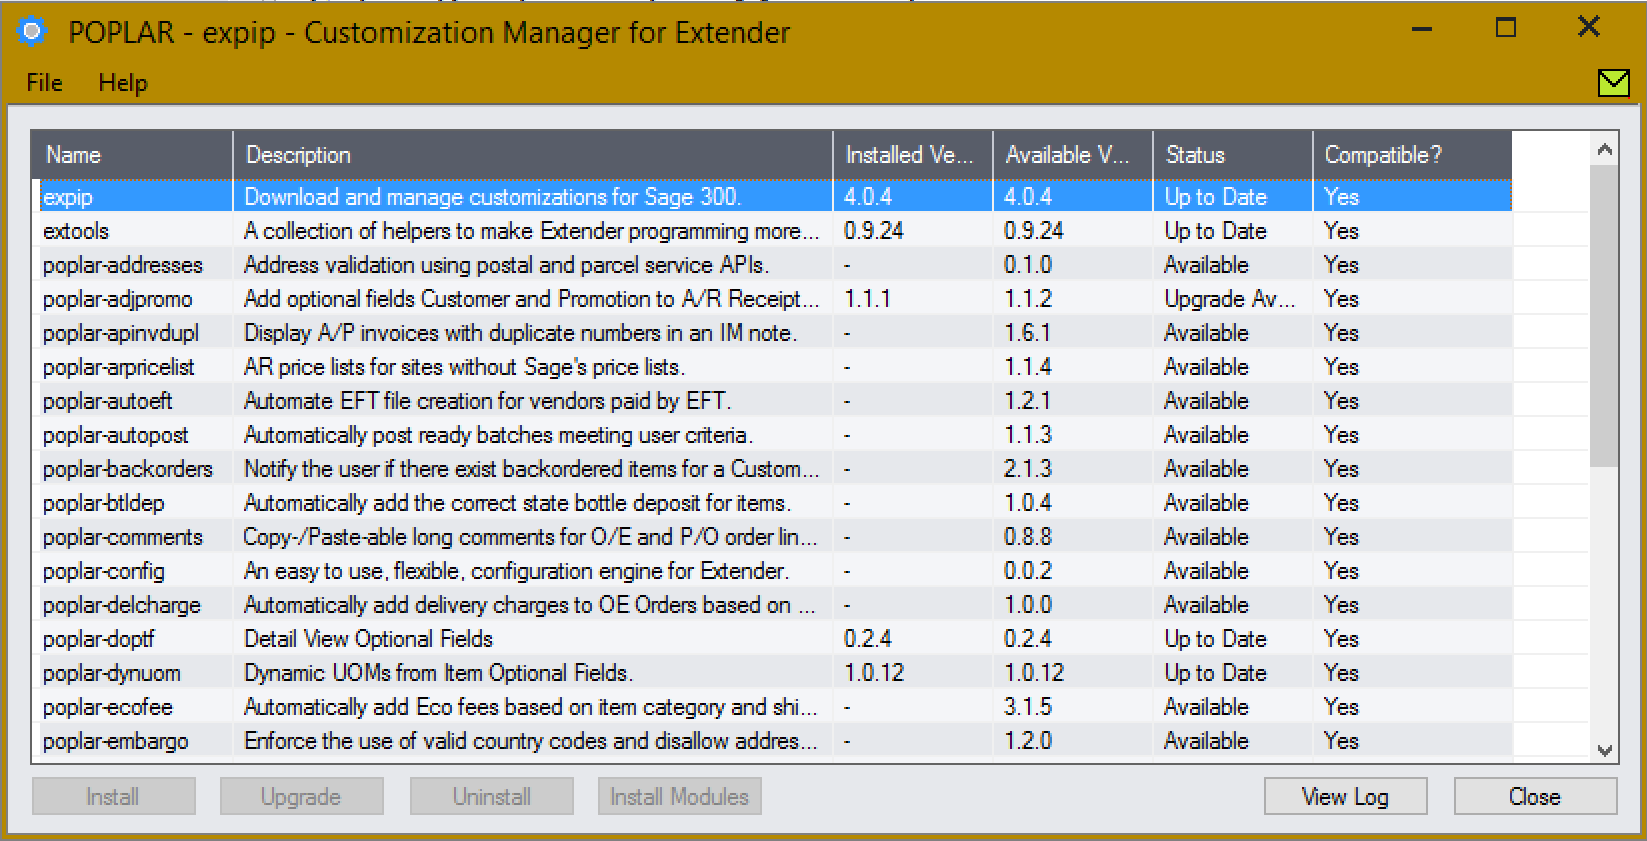
Install the Customization Manager Package
Customization Manager can manage itself. By installing the packaged version of the module, you’ll be able to upgrade it at the click of a button - no more file downloads. Installing the Customization Manager package is highly recommended.
- Highlight the expip package.
- Click the Install button.
All done. When new verions are released, you will see an upgrade available for
the expip package.